
1/4" (6mm) Shank Carbide Burrs - 1/4 shank die grinder bits
Match drillingtools
4. Ensure proper tool and insert setup: Proper tool and insert setup, including correct alignment and clamping, is crucial to prevent premature wear. Follow the manufacturer's recommendations for insert positioning and tightening torque.
9. Properly handle and store inserts: Handle inserts with care to avoid damage. Store them in a clean and dry environment to prevent contamination and oxidation.
Match drillingmachine
1. Choose the right insert material: Different materials have different wear resistance properties. Select an insert material that is designed to withstand the specific cutting conditions and materials being machined.
There was one more step I needed to complete before moving on for the night, and that was riveting the nut plates to the spar web that are used for the most inboard tank attach bracket. These are placed on the BACK side of the spar web, so that its easier to bolt the tank into place. There are three pre-drilled holes in the spar web; one for each nutplate. I simply clecoed them into place and match drilled the holes.
7. Consider coatings or surface treatments: Coatings or surface treatments can improve the wear resistance of inserts. Explore options such as TiN (titanium nitride), TiCN (titanium carbonitride), or PVD (physical vapor deposition) coatings.
Match drillingkit
This worked pretty good. Then I clecoed on the nutplates, and riveted them using the backrivet method. I used the back rivet tool in my rivet gun to press against the tail of the rivet from the inside of the wing and then the bucking bar on the flush head and bucked from the top. This worked out really well.
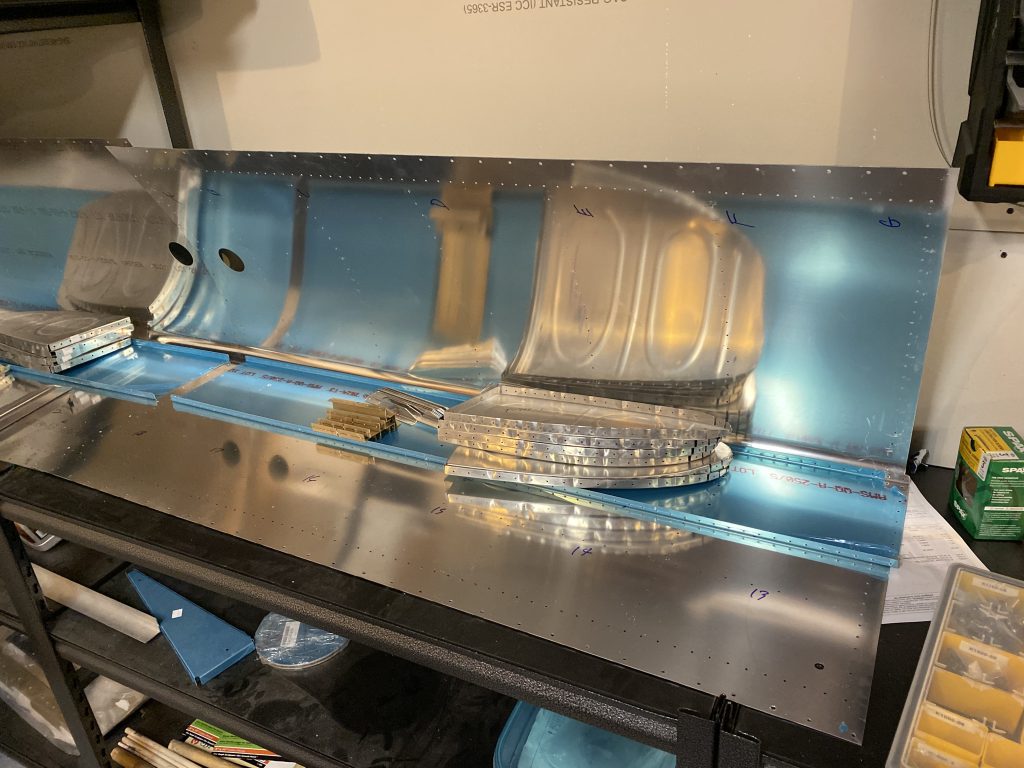
More Fuel tank work! Tonight I wanted to get the left fuel tank match drilled and then disassembled so that I could begin working on deburring the parts and getting them ready for final assembly. I already had the left tank off the wing and on the bench from my last session, so I started in by match drilling all the 3/32″ holes.
Maintaining control over the wear of milling inserts is very important as it directly affects the milling effect and production efficiency. When the inserts are worn too much, their cutting ability will decrease, resulting in a decrease in the quality of the machined surface and even damage to the workpiece. Therefore, regular inspection and replacement of inserts to ensure their wear is within a reasonable range can improve production efficiency and product quality.
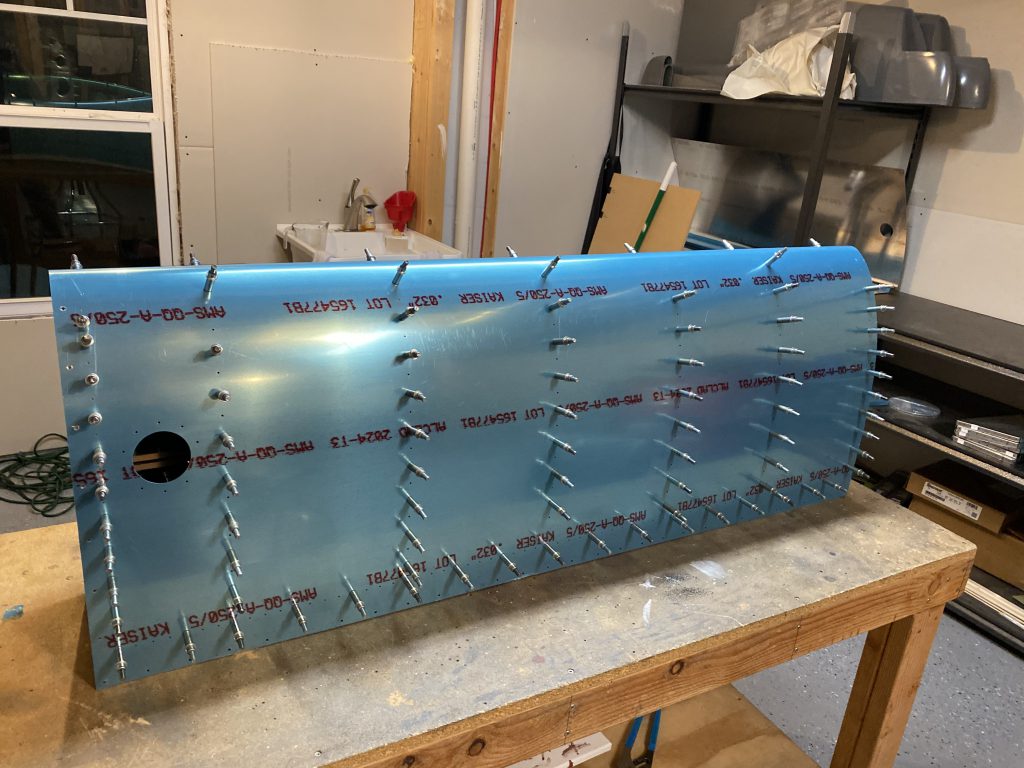
We need to attach these with AN426AD3-4 rivets so the head will sit flush on the spar web, so that the tank attach bracket can sit against the spar web. So I used the microstop countersink, as it was already setup for the tanks depth and countersunk the holes. Except I ran into an issue:
Match drillingaerospace
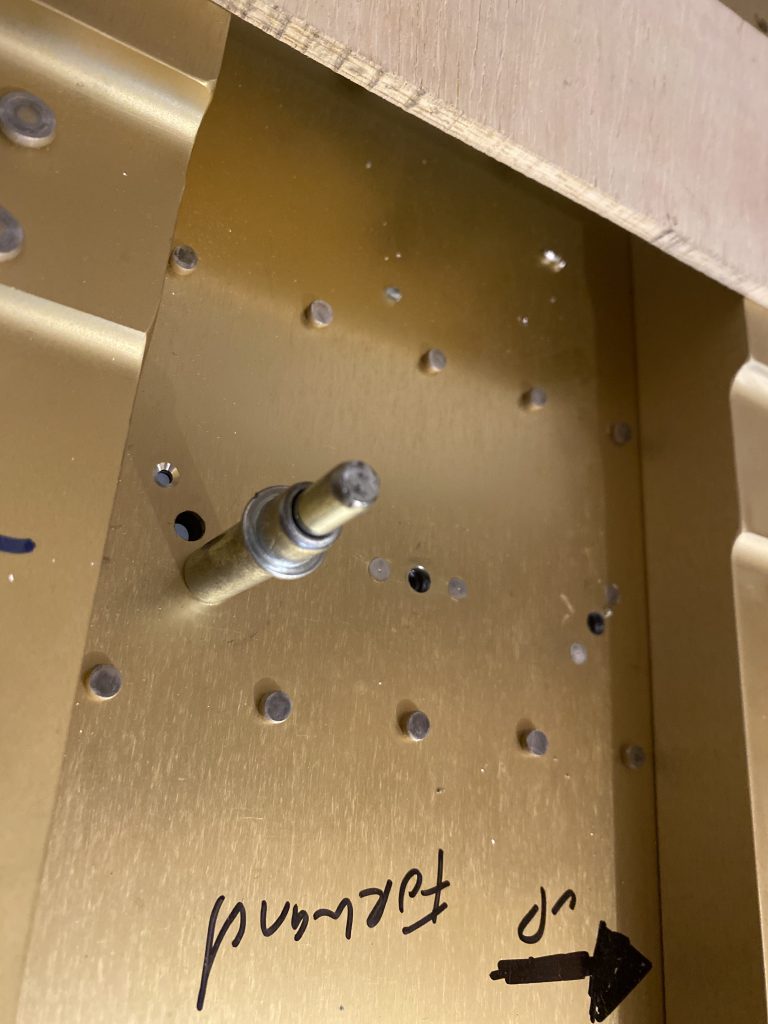
As you can see in the photos above, there wasn’t enough clearance between the spar reinforcement bars to get the pilot into the holes on the upper and lower nutplates. So I got a bit creative. I used a deburring tool in my power driver and very gingerly countersunk the holes, checking the depth every so often with a rivet until I had the rivet sitting flush:
I finished up the left wing, then moved on to the right wing, when I noticed: I am SHORT by one K1000-3 nutplate! I didn’t have enough to finish the last hole. I need to get an order in to Vans anyways to get some proseal and other things on their way, because we are very close to sealing up these tanks! So thats where I left it for the night: One nutplate short!
5. Implement effective chip control: Proper chip evacuation is essential to prevent chips from scratching the insert and causing wear. Use chip breakers, chip deflectors, or chip evacuation systems to control chip size and direction.
6. Perform regular maintenance: Inspect inserts regularly for signs of wear or damage. Replace worn inserts promptly to avoid further damage to the workpiece and tool.
Once I had those done, I then started on countersinking the rivet holes that run the length of where the skin attaches to the rear baffle, as per the instructions. We countersink these so that its easier to slide the baffle in place with the wet sealant during assembly. If we had dimpled these, it would be much more difficult to do this evenly. The micro-stop countersink was already setup for the proper depth, so I made quick work of those holes. Next up was to open the screw holes that attach the skin to the spar and the W-423 strip to a #19 hole. Once I had all the holes match drilled, I labeled where the parts were clecoed, disassembled the tank and set its parts on the shelf to be later deburred and finished.
Match drillingholes
10. Seek expert advice: If insert wear issues persist or if you need assistance with selecting the right inserts and cutting parameters, consult with tooling experts or manufacturers for guidance. They can provide valuable insights and recommendations.
In addition, controlling the wear of milling cutters can also reduce processing costs. inserts that are worn too much need to be replaced more frequently, which not only increases material and labor costs but also increases downtime on the production line. Regular maintenance and replacement of inserts can extend their service life, reduce downtime and costs. Therefore, controlling the wear of milling cutters should be an important part of the production process.
8. Avoid excessive cutting forces: Excessive cutting forces can accelerate insert wear. Optimize cutting parameters and tool geometry to minimize cutting forces.
3. Use proper cutting fluids: Cutting fluids help to cool the insert and lubricate the cutting process, reducing friction and heat generation. This can significantly extend insert life.
2. Optimize cutting parameters: Adjusting the cutting speed, feed rate, and depth of cut can help reduce insert wear. It is important to find the balance between productivity and insert life.


 0086-813-8127573