
Ascent Solar Technologies, Inc. - ASTI STOCK NEWS - asti stock news
Angle of center drillchart
The primary function of a center drill is drilling a hole to be used as a lathe center. Center drills have a pilot section, acting as an oil reservoir. All Industrial Tool Supply offers center drills from brands like Harvey Tool and Fullerton Tool.
Angle of center drillfor metal
All Industrial Tool Supply offers a wide selection of both spotting drills and center drills, so you can use one, or both to get the desired results based on your project, resources, and the material. Call our team of experts to discuss the pros and cons and we’ll help you choose the right one.
A secondary purpose is using a center drill as a substitute or alternative to a spotting drill in some circumstances. Even though it may not be the intended purpose of the tool, it can work for some applications.
Before drilling a hole, it’s common to use a spotting drill or center drill to ensure accuracy for the drill. Spotting drills and center drills may look similar at a glance, but they are actually intended for two different purposes. Let’s take a look at the uses for each.
Center drillsize chart pdf
Angle of center drillfor steel
In retrospect, I would have made the counterbore jig longer than 4″ to provide more heft and clamping surface so it would better stay in place during drilling. I found myself fussing with the jig several times while drilling because it would shift slightly if I got too aggressive with the drilling. Perhaps I’ll incorporate this enhancement into a rev 2 counterbore jig if I get “volunteered” for another deck project…
Spotting drills are shorter and stiffer, reducing flex, and have few, if any flutes. Spotting drills also have a point angle that’s slightly larger than the point angle on your drill, so that the center of the drill is the first portion to contact the workpiece. If the reverse is true (the spotting drill point angle is smaller) damage to your drill could result.
Downsides of making this substitution: center drill pilot tips can be delicate, and subject to breaking at a much higher frequency than spotting drills. Center drills commonly have a point angle of 60 degrees - as mentioned above, this may or may not be ideal, depending on the drill angle. If the point angle is less than desirable, the drill could deflect, reducing accuracy.
Center drillDimensions
Angle of center drillsizes
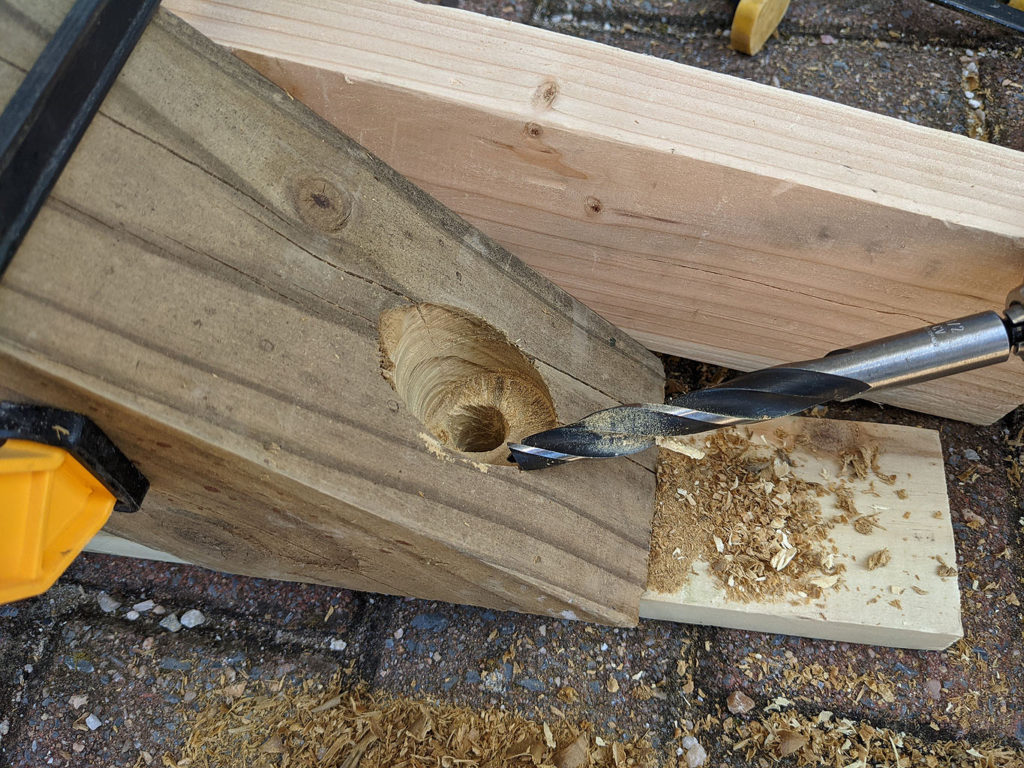
Using the forstner bit center indent as a guide, the final step was to drill a 5/8″ diameter guide hole for the lag screw. Having a sacrificial support board helps to produce a hole with minimal tear out.
Drilling a very precise hole can be challenging. Irregularities in the material, flex in the drill, and other factors can contribute to imprecise results.
A spotting drill is used to create a small dimple or divot in your workpiece prior to drilling. A traditional drill can flex, causing it to “walk” or wander off of the desired location and decrease accuracy. The dimple created by the spotting drill helps locate the center and can prevent this problem.
It worked out that drilling until the forstner was fully in the hole, with about 1/4″ protruding, resulted in the appropriate hole depth. After drilling and removing the jig, I was left with a flat counterbore with a small indent in the center. Tip: if you have a helper, ask him/her to “eyeball” the drilling operation to keep the bit vertical as viewed from the side and front.
Angle of center drillpdf
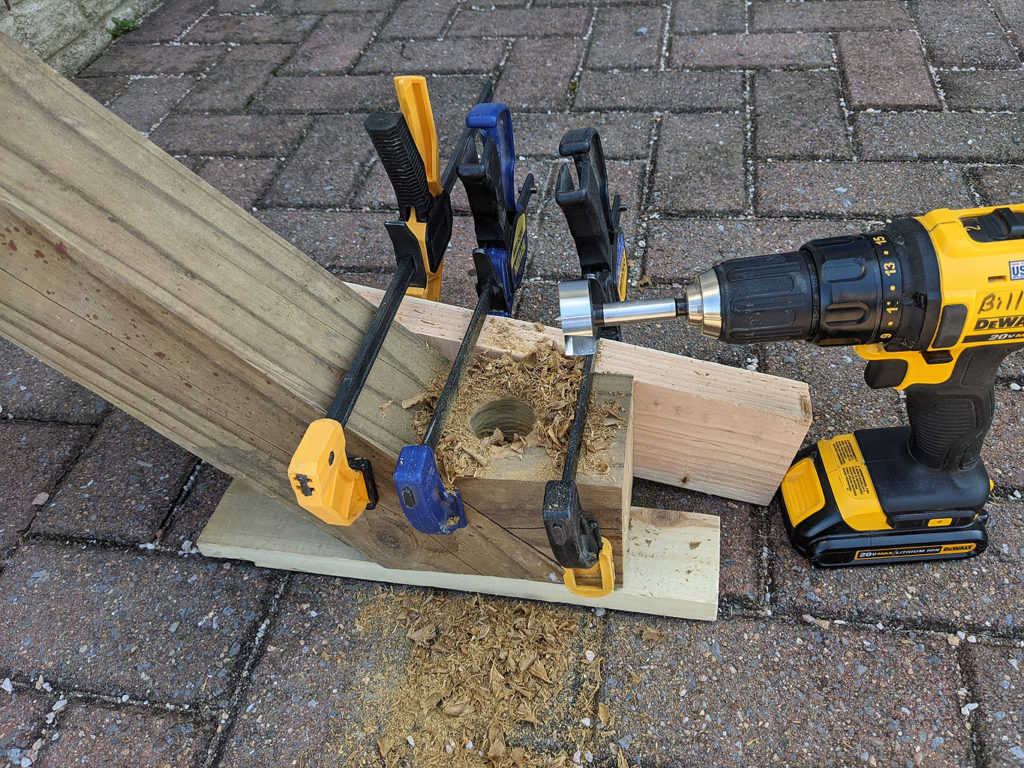
Drilling a large diameter counterbore at an angle “freehand” is difficult because the bit will only be in partial contact with the wood when starting to drill and it will have a tendency to skip across the surface. This was the situation I found myself in when I was volunteered to add diagonal braces to my daughter’s two-story high wooden deck. Each 40″ long brace required holes drilled at a 45 degree angle in order to attach it securely to the deck structure via 6″ long lag screws. One end was attached to the support post, one end to the deck beam. The 5/8″ diameter lag screw holes also needed to be centered inside a 1-1/2″ diameter counterbore to accommodate a washer. Not having a drill press handy to drill the counterbore, I came up with a simple jig to get the job done.
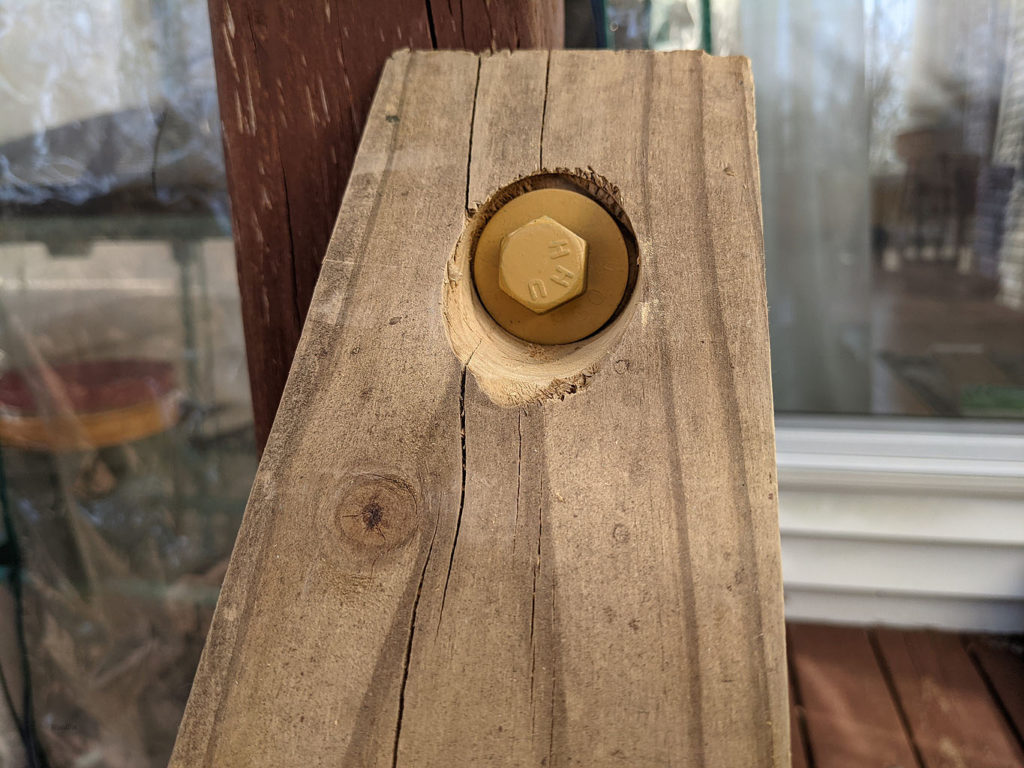
The photo below shows one of the brace pieces with a washer and lag screw in place. The first counterbore was a bit rough around the edges but subsequent ones were cleaner. As you might expect, the key is to keep the counterbore jig securely clamped in place to keep the bit from wandering.
To make the jig, I used a chop saw to cut off the end of a piece of leftover 4″ x 4″ bracing at a 45 degree angle and then cut this angled piece off leaving a jig about 4″ long. I butted the angled end of the jig against one of the braces with the angled end of the brace flat against a support board, and clamped it in place. Using a square, I drew a line straight up from the center of the hole (marked on the side of the brace) to the top of the jig. This line was extended across the top of the jig and marked in the center of the 4″ wide piece. With the hole location established on the jig, I drilled a 3″ deep hole using a 1-1/2 diameter forstner bit that created both the guide hole in the jig as well as the counterbore in the brace board. I basically drilled until the forstner bit was in full contact with the brace board.
Sometimes. While it’s ideal to use the correct tool whenever possible, machinists will sometimes substitute a center drill for the purpose of spotting, instead of using a spotting drill - perhaps because center drills are sometimes less expensive than spotting drills.


 0086-813-8127573