
Chamfer Mills - chamfer mill
Home Company About us Why Us Products Standard Products Sector Wise Toolings SAMURAI Anti-Vibration Tool Value-Adds Videos Downloads News Blogs Quick Connect
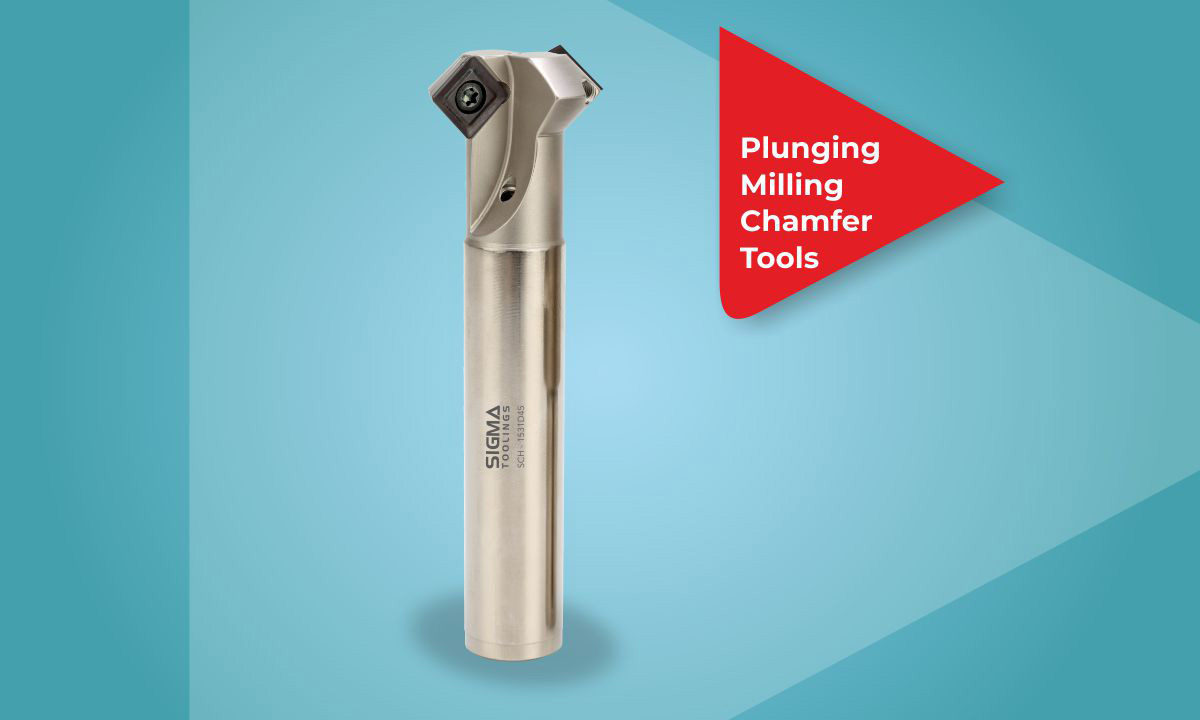
Metal cutting and finishing jobs in manufacturing need the right tools for flawless execution. Sigma Toolings offers a wide range of standard toolings to perform these tasks to perfection. Our compact, high-speed chamfer tools offer a durable and dependable fit for plunging and milling operations.
To open the mold, cutters have traditionally used a "church key" style can opener-the kind with a triangular-shaped sharp end-mounted to the bench. This tool is still used successfully by many cutters today. They also have the option of using vise-style clamps that mount on the side of the bench. "This cutting aid especially comes in handy when cutting a high volume of molds at a time, because there is less hand fatigue," says mold cutter Steve Straley, who works in the casting product development department at Rio Grande. Adelman uses mini vise grips. "I like the mini vise grips because they don't let go," he says. "I don't like it to slip, because that's when you cut yourself."
In addition to ensuring that delicate waxes can be removed without distortion, the mold cutter must cut the mold in such a way that the two halves will match up perfectly time after time, and the injected wax will fill well and require minimal cleanup.
Trying to fill an unvented mold, says Annetta, "is like trying to pour beer back into the bottle without a funnel." Without an obvious escape route, the air either forces its way back out the sprue hole or becomes trapped in dead-end cavities.
Even when the material is chosen for considerations other than cutting, the mold cutter needs to be aware of the material's cutting qualities. "Natural rubbers are tougher and stronger, and cutting them requires a great deal of force," says Michael Knight of Castaldo in Franklin, Massachusetts. "It's easier with a wet, soapy knife, but it's still tough and hard to cut."
Actually cutting the core so that it'll snap back into its original shape is one of the most difficult challenges mold cutters face, and it's one that can be learned only by practice. "Even when you know how to do it, it's hard to tell if you're getting it right until you've done it, and every [core] is different," says Rowe.
The key consideration in the cutting instrument is that it must be sharp-very, very sharp. "When you use sharper blades, the molds fit together better," says Dominic Annetta of DoPaso in Albuquerque, New Mexico. "If you look at the cut of a dull blade, it's very coarse. You want a smooth surface where the two layers of rubber come in contact. With a dull blade, there's a kind of fuzzy layer. It's like cutting bread with a dull knife: You get crumbs on the surface."
Mold cutting isn't a single skill, but rather the accumulation of tricks and techniques for making a mold work. Knowing where to look for problems, when to try again, and when to call in an expert are all part of the mold cutter's art. There's no one way to make a mold, and the successful mold cutter draws on a variety of techniques to reach the final goal-a smooth, undistorted wax model for casting, which ultimately results in a beautiful piece of finished jewelry.
With the calculator from Meusburger the cutting data is calculated quickly and easily. Calculate the feed rate for inside and outside circular milling.
Placing the parting line correctly is also essential for the easy release of the wax without distortion. "The primary importance of the parting line is to get a piece out of the mold without distorting," says Annetta. "Ideally, you can take one half and flex the mold, and it pops right out."
Wood molding Cutter
Mold cutting sounds simple enough: Using a sharp knife and a simple tool, such as a can opener or a pair of vise grips, the mold maker separates a rubber mold into two halves, allowing the model and subsequent waxes to be removed. But like so many seemingly simple tasks, there are intricacies to cutting a successful mold that go well beyond cutting the block of rubber into two parts.
Plunge milling involves cutting into the workpiece straight from the top similar to a boring operation. Here, cutting is done by the end of the tool rather than the side. Plunge milling is done in cases where vibrations make side milling impossible. Plunge milling is done when the material stability is bad and the material is difficult to cut, and when the power or torque of the machine is limited. The power consumption and noise level for plunge milling is lower than other milling methods, and the change of cutting force from radial to axial offers much more rigid cutting.
One trick Kate Wolf of Wolf Designs in Portland, Maine, uses to plan parting lines is to use a fine tip Sharpie marker to draw a line around the model and down the sprue exactly where she wants the parting line to be. The ink transfers to the rubber, offering a guideline for cutting. "I start cutting the mold at the sprue," Wolf says. "As I pull the mold apart, I look for the ink line that has been transferred. I cut down the mold and all the way to the other side of the sprue."
Professionalmold cutting tools
Solid Carbide Boring Bar, .2200 Minimum Bore, .0050 Radius, .1875 · Catalog Page · Speeds and Feeds. RBB041095 - Carbide Boring ...

Woodmold cutting tools
"A core is a separate piece that comes out with the wax model from the two main mold halves, and is then extricated from the model," explains Rowe. "You cut one the way you peel an orange in a spiral, so that it can unwind. It comes out in a long, thin string, and then can snap back to its original shape."
In addition, there is no one right way to cut a mold. The only true measure of success is whether the mold produces consistent waxes that can be removed without distortion, and with any given mold there are multiple ways of achieving that goal. A technique that works for one mold cutter may be awkward or difficult for another, and an approach that works for one design may produce less desirable results on another.
Founded in 2001, Sigma Toolings quickly emerged as a market leader in customized, high-end tooling solutions in India. Today, Sigma is one of the few Tooling solutions providers in India to have a dedicated company for R&D and innovations, leverage Artificial Intelligence for its solutions, and offer a digital Tooling product range with capabilities to deliver Project Management and Productivity Improvement.
For very complex molds that need highly precise parting lines, the mold maker may choose a transparent RTV (room-temperature vulcanizing) material, which allows him to see the location of the model in the mold as he cuts. Although this material would seem like the obvious choice for all molds, there are factors to consider besides visibility for ease of cutting: they include tear strength, mold life, and cost.
Molding Cutter Blades
2023628 — We have put together a selection of tools – plus cutting parameters – that ensure a successful deep hole drilling process.
It's also worth remembering that sometimes it's better to find someone who knows the trick you're missing, rather than to keep struggling with a too-difficult mold. "There's always somebody out there who has the answer," says Rowe. "Sometimes it makes sense to send it to someone else. If you send your model to some casting house that has a really good mold cutter, and they charge you $25 to cut a mold, you might figure that's $5 worth of rubber and 20 minutes. But if it's going to take you five tries to do it, that ends up being a money maker for you. Knowing when to punt is a useful skill."
If it sounds like a tall order, it is, and even veteran mold cutters may have to cut several molds for a difficult design before finding one that works perfectly. Knowing the tools and tricks used by experienced mold makers can reduce the number of failed attempts, however, and make it more likely the mold will give up the wax without a struggle.
Sigma Toolings is focused on providing Indian businesses with toolings that meet global quality. Actively conducting research, the development we bring state-of-the-art European technology to local businesses in India at Indian price points. All of Sigma Toolings’ products are tested and certified in line with the global standards for durability, accuracy, and safety. Apart from bringing you the best of global tooling technology, we also provide consultation on key matters related to machining.
Whatever method you use, when it comes to cutting molds, nothing substitutes for experience. From learning to anticipate the need for vents or to find the most trouble-free location for parting lines, mold cutters shouldn't hesitate to experiment with a new technique-even if it means cutting a second mold when the first doesn't work out. Failure can be as good a teacher as any textbook.
In some molds, ad-ditional rubber is required to fit inside the model itself, such as inside a basket setting or in the undercut of a ring. Often, these inner sections are larger than the openings the rubber must be pulled through to get it out. To produce an accurate wax, the rubber must remain in place during injection, but be easily removed from the delicate wax. Those occasions call for a core.
As a result, a central part of the mold cutter's job is to place parting lines in the best location. Although experienced mold cutters can often do this on the fly when the piece is of a familiar style, more complex and challenging models call for careful planning.
Bestmold cutting tools
Air vents don't have to be big cuts, though. "A vent is the size of an extremely thin surgeon's knife," says Grandi. A small cut with a tiny amount of powder dusted into it to keep it open is all that is needed.
But there are occasions when the demands of cutting the mold will help determine the type of mold material used. For example, complex molds that need spiral-cut cores (see "Cores," page 41) require high tear strength and lend themselves to natural rubbers, which generally offer greater strength than silicone rubbers. (However, silicone rubbers have improved greatly in this area over the years, and in some cases come very close to the tear strength of natural rubber.)
"You generally try to find a place that's unobtrusive and easy to clean up, and usually that means trying to find a corner," adds Peter Rowe of Seattle. If that's not an option, the best bet is to place it across a flat surface or on a smooth, gentle curve where it can easily be polished off, suggests Daniel Grandi of Racecar Jewelry Co. in Cranston, Rhode Island.
This calculator gives guideline cutting speeds for a specified diameter. Slide the diameter back and forth and the table will update for the various materials.
To properly cut a mold, you need the right tools for the job. The only tools that are absolutely required for mold cutting are a cutting instrument and something to hold the rubber as it is peeled back. These can vary from scalpels and can openers to curved cutting blades and specially designed mold holding systems. Choosing a tool is largely a matter of individual preference rather than a question of right versus wrong.
By comparison, silicone vulcanizing rubbers "cut like butter," says Knight. "The mold maker has to learn to take it easy. If you don't, the knife will keep sliding through and the blood will flow." In addition, the knife doesn't require the lubrication of soapy water, because the natural silicone oil in the rubber provides ample lubrication.
MoldingcuttingTool Home Depot
Mold cutting sounds simple enough: Using a sharp knife and a simple tool, such as a can opener or a pair of vise grips, the mold maker separates a rubber mold into two halves, allowing the model and subsequent waxes to be removed. But like so many seemingly simple tasks, there are intricacies to cutting a successful mold that go well beyond cutting the block of rubber into two parts. In addition to ensuring that delicate waxes can be removed without distortion, the mold cutter must cut the mold in such a way that the two halves will match up perfectly time after time, and the injected wax will fill well and require minimal cleanup.
To decide where vents will be necessary, "imagine filling the mold with a rubber balloon," says Annetta. "As you inflate, where are the last places the balloon is going to go?" Those are the spots that will require a vent.
The primary considerations when deciding on a mold material don't usually include the ease in cutting it. The complexity of the mold, the detail involved, and whether the model can stand up to the heat of vulcanizing are all factors that will determine whether mold makers choose materials with greater or lesser tear strength and greater or lesser hardness, and steer them toward heat or room-temperature vulcanizing options.
Home Company About us Why Us Leadership and Team Careers Event Events Certifications CSR Products Standard Products Sector Wise Toolings SAMURAI Anti-Vibration Tool Value-Adds Videos Downloads News Blogs Quick Connect
"Leaving a [mold mark] on wax patterns is pretty much impossible to avoid, so the best scenario is to leave it where it is going to be easy to clean up," says Straley. "This means avoiding recessed areas of the pattern, finely textured areas, or any intricately detailed design work. You must learn to look ahead and imagine having to clean off the parting line to put it exactly where you want."
Aug 27, 2021 — If you're only poking a few holes, high speed steel (HSS) is fine. Using a cobalt drill bit isn't worth the extra cost because on aluminum, its ...
Keep in mind, as well, that properly preparing the mold can make a difference when it comes time to cut it. "When you heat-cure a mold, the big thing is not to over cook it, and make sure the temperature is right," says Adelman. "That makes the cutting properties fairly consistent. I want consistency so I can do everything the same way every time, so if there is a problem I can easily figure out what the problem is."
Cuts from sharp cutting tools are a perennial hazard for mold cutters, and one that cannot be completely eliminated. But ways to reduce the frequency include using sharp blades, which are replaced as soon as they become even slightly dull; wearing a puncture-resistant safety glove on the hand holding the mold; and keeping fingers out of the path of the blade. "I always plan for the knife to slip or the blade to break and make sure nothing is in the way," says Adelman. "I wear a very heavy denim apron so if the knife falls or slips, it doesn't do much damage."
Finally, consider using magnification when cutting molds, recommends Straley. "One thing that can take your mold cutting to the next level is using magnification, such as Optivisors or Obrira binoculars," he says. "Under magnification you can really be accurate in creating the optimal parting line [the line cut around the model to separate the two halves of the mold]."
Molding Cutter machine
"I read the basics when I first started on how to make a mold, and it was basically put in the model, cook the rubber, take a blade and cut down the side, and take the model out," says Stuart Adelman of Artelle Designs in Plymouth, Minnesota, who has been cutting molds for nearly 35 years. "But there are lots of nuances that make it an art, and most of them are learned through trial and error."
Another approach, which some mold cutters say offers an even stronger fit, is to cut "peaks and valleys" through the entire mold. "When I first start to cut a mold, I cut a thin border, maybe 1/8 inch to 1/4 inch all the way around. Then everything else is wavy cuts," says Rowe. "I just swing the knife back and forth as I cut so that it cuts a series of teeth. The mating surfaces all lock into each other, and nothing is flat to flat." The final distance to the model is cut straight along the desired parting line.
It can also be helpful to have a reference of the model's precise location in the mold. Many mold cutters will sketch a quick drawing showing the model's position to help them cut the mold as desired. Another option is to use a digital camera to take a picture of the model in the mold prior to vulcanizing, suggests Annetta.
An archetypal opulent Victorian corner pub very close to the seafront. The high ceiling and enormous windows are impressive and The Victoria is a very ...
HOLDRIDGE 4-D Radii Cutter from Bid On Equipment. BOE offers an extensive inventory of competitively priced Slitters and Cutters.
In order to avoid excessive mold marks on the wax, a mold must meet up perfectly when it's put back together. "If the lock isn't good and the surface of one half of the mold can slip on the surface of the other half when put together, it can turn the parting line into a shift line, leaving a difficult-to-remove, uneven step on the wax pattern-something that is definitely not desirable," says Straley.
Mold cutting toolsfor metal
Because vents will leave mold marks on the piece, mold cutters typically try to cut only as many as absolutely necessary. When in doubt, test-injecting the mold with wax is a sure-fire way to discover precisely where vents are needed. Failure to fill is a typical sign that air is being trapped, and a vent in those areas will solve the problem.
Ganoksin is the worlds largest educational website for jewelry making and metalsmithing. Our community is the heart of Ganoksin. It is the oldest and largest jewelry making community on the web.
Because cores can be so difficult to cut, and because they result in a relatively fragile mold even when done correctly, Grandi usually recommends making design changes to avoid them. One alternative is to make the item in two pieces that will be soldered or laser welded together after casting. "It gives you a much cleaner casting and a much easier mold to produce from, and you can produce thousands of pieces without having to replace the molds all the time," he says.
Lumberjack Tools catalogs feature our products, accessories and BurnStencil products. Submit the form to get a physical catalog mailed to you within 1-2 weeks.
Balloffet is your best partner for the supply of drawing dies for all types of metals, including coated, even in the smallest diameters.
Even on a well-cut mold, the slight gap of the parting line can result in a thin ridge of wax on the piece, which is also known as a mold mark. Therefore, when planning a parting line, the goal is to place it where it will be easy to clean on the finished casting.
You assume all responsibility and risk for the use of the safety resources available on or through this web page. The International Gem Society LLC does not assume any liability for the materials, information and opinions provided on, or available through, this web page. No advice or information provided by this website shall create any warranty. Reliance on such advice, information or the content of this web page is solely at your own risk, including without limitation any safety guidelines, resources or precautions, or any other information related to safety that may be available on or through this web page. The International Gem Society LLC disclaims any liability for injury, death or damages resulting from the use thereof.
There are a number of methods of ensuring the mold fits together correctly. A traditional method is the creation of "corner posts," in which the cutter leaves a positive peak at each corner, which fits into a negative peak on the other half of the mold.
Chamfering operations are done to machine the edge of the workpiece and provide it a beveled edge instead of sharp corners. The workpiece is held in the lathe machine and rotated in an anticlockwise direction along the lathe axis. After this, the chamfer tool is fed in the direction towards the workpiece. The edge of the tool comes in contact with the workpiece to remove metal. Chamfering operation is performed before threading operation on the workpiece to avoid damaging it. The chamfering operation helps the threading tools to more easily through the workpiece during threading operations.
The award-winning Journal is published monthly by MJSA, the trade association for professional jewelry makers, designers, and related suppliers. It offers design ideas, fabrication and production techniques, bench tips, business and marketing insights, and trend and technology updates—the information crucial for business success. “More than other publications, MJSA Journal is oriented toward people like me: those trying to earn a living by designing and making jewelry,” says Jim Binnion of James Binnion Metal Arts.
Jan 24, 2019 — For thread depth I always use the classic formula for a 60 degree thread form (metric, UN etc) of . ... thread depth and check final fit with a ...


 0086-813-8127573