
Feeds & Speeds For Drills | Norseman Drill & Tool - hertel speeds and feeds
Take it slow and get comfortable using it on some small projects or with some scraps. Routers are a very useful tool once you learn how to handle one.
You can now mount the Quick-Change Tool Post on top of the Compound Slide (P/N 1270) using a 10-32 x 2″ SHC Screw* (P/N 40730, sold separately). See the Compound Slide instructions for details on using the compound slide and quick-change tool post together.
Or, you can simply clamp a straight edge to run your router along as well. There are also many jigs that you can make or buy to add to the functionality of your router.
Also, the ½″ router that I’m using comes with a ¼″ collet attachment so I can still use all my old ¼″ router bits with it even though they are a different shank size.
After a recent poll on my Facebook page, I was overwhelmed with how many people had so many questions about how to use a router.
It’s handy to have the ability to plunge and some fixed base routers have a separate attachment you can purchase to give you both fixed and plunge base options.
Quick changetool post types
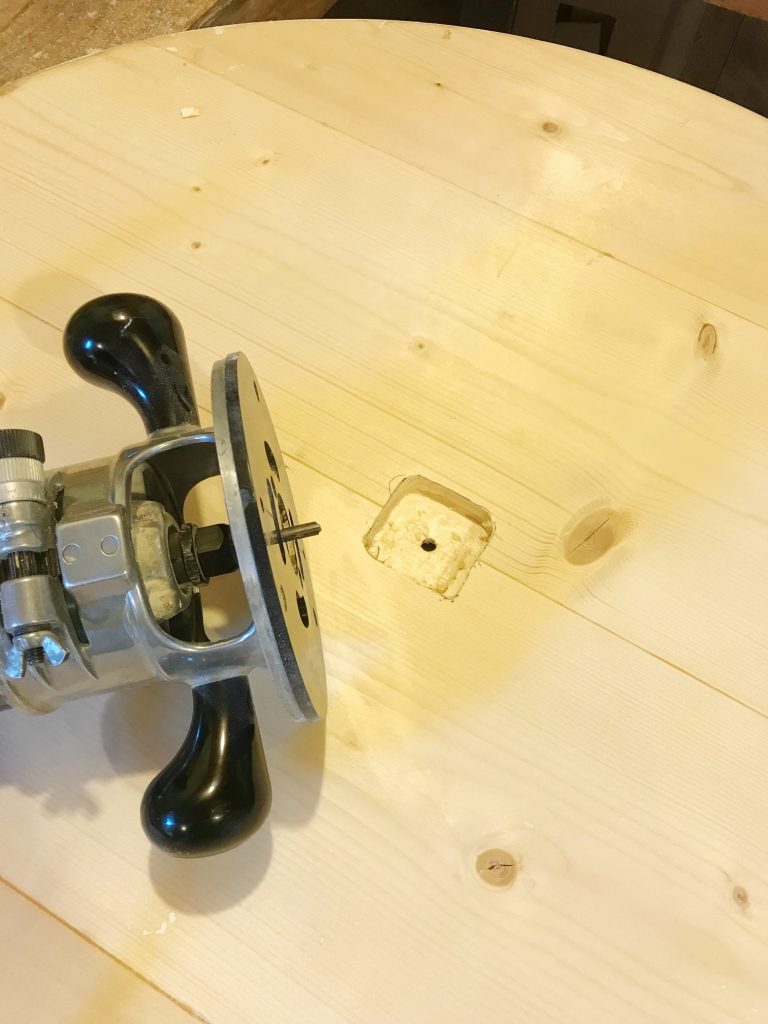
I built a jig to hold a dowel rod so that I could route a slot to insert a 1×3 to make a modern dresser base. So I don’t have a lot of information to share. But, here is a link to a great guide to router tables.
They are great for not only adding some decorative touches to your projects, but they also can be used to cut slots, grooves, and dadoes for joinery methods, flatten table tops, carve, and smooth out rough or uneven edges when needed.
Router tables are basically a table base where you can attach a router upside down so that the router bit sticks up out of the table. Like a table saw…but for a router.
When using a router, I HIGHLY recommend doing a couple test pieces to make sure you’ve got your adjustments set how you want.
A good example is a circle jig. You can purchase a circle jig to mount your router onto that will allow you to cut a perfect circle. OR, you can make one as well.
So, when running the router along the outside edge of a board–for example around the outside edge of a picture frame–you should cut counterclockwise (or running from left to right).
Dorian Tool
This accessory brings to your Sherline lathe the ability to change tools quickly and easily. It uses a dovetail design to locate removable holders in a fashion similar to that used in production machine shops. The case hardened steel tool post has two machined dovetails to accept the three included tool holders. The three interchangeable tool holders are designed to hold a 3/8″ round boring bar, a 1/4″ HSS cutting tool, and a cut-off blade (cutting tools are not included). Each holder has two knurled brass knobs; the lower knob allows you to easily adjust the height of the tooltip, while the upper brass knob locks the height in place. Changing tool holders is simply a matter of releasing the locking screw on the tool post, sliding out one tool holder, sliding in another, and re-locking. If you find your jobs require a lot of tool changes, this timesaving accessory will make your projects that much more of a pleasure.
In this post, I’m sharing some tips on getting started using a router, breaking down the different types, and giving you some project ideas you can practice with!
A router is one of those tools that you may not use every day, but there’s not really an alternative to use when you need it. It’s both a versatile, but specialized tool. Nothing else really takes it’s place.
I don’t have a plunge router to show you pictures of, but basically, a plunge router is just a router that has a “springy looking base” that allows you to plunge the bit into the wood and lift it back up.
Quick change toolingkit
Most routers come with some type of attachment that will run along the edge of a board and allow you to cut a certain distance from the edge.
Use high quality, sharp router bits. Crappy bits can chip, burn, bog down and cause kickback. Use sharp router bits for cleaner and safer cuts.
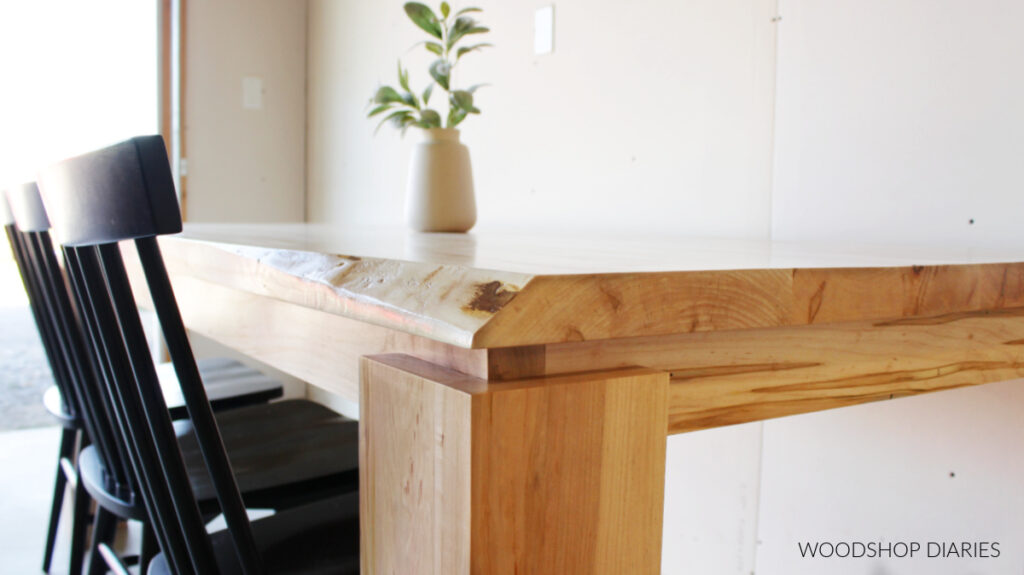
Trim routers usually have ¼″ collets for ¼″ router bit shanks and are best used for small details like adding decorative edges shown here in this cutting board.
R8Quick Change Toolingsystem
Routers are a super versatile tool. And like any power tool, they pose a possible danger, especially if you aren’t sure how to use it.
Quick ChangeTool Post
Clamp pieces to your workbench to route and keep your hands out of the way. If you are using a router with two handles, keep BOTH hands on it.
Examine the area you plan to route. Do not route if you see cracks, knots, or loose pieces. This can cause damage to your project, or, in worst cases, can fly off and cause danger to you.
These are handy for applications like where you glued two pieces together and the edges aren’t flush. I used a flush trim bit in this pumpkin tray project where I glued a piece onto the top and they didn’t match up perfectly.
Typically, you simply slide it into the collet and use the included wrench (routers come with a wrench for this) to tighten the nut.
V groove bits, round nose (or juice groove bits), and other decorative groove bits come in various sizes as well and are often used for carving designs like the juice groove shown below in this stove top cover.
If you just want to add some decorative edges to your projects and are on a budget, a trim router is probably your best option.
Sometimes they are called palm routers or hand routers. I’m currently using this corded Ridgid Trim Router in my shop. It also comes in a battery powered version if you want to ditch the cord.
If you plan to use it to cut out circles, table tops, cut large dadoes, or you are going to be using it on a lot of thick material, I’d upgrade to a larger fixed base router.
BridgeportQuick Change Tooling
Some are for edges and they will have a little bearing at the bottom or the top. This bearing is designed to ride along the edge of the board while the cutter cuts a profile.
Be sure to read manufacturer’s instructions on your routers and get comfortable using them on small projects before tackling anything huge.
In my experience, they don’t do well removing a large amount of material at one time. I’ve used mine in a circle jig to make a thick, round table top, but I don’t recommend it. It’s just too small for making large cuts.
When using a hand held router, it’s helpful to use a router guide or jig for more accurate cuts (like the circle jig seen above).
Pictured below are two optional holders. P/N 2282 holds 3/8″ square shank tools. P/N 2295 comes with a 55° carbide insert. The post and holders are all machined from steel and have a black oxide finish. Knurled brass knobs adjust tool height.
The improper use of machine tools and their accessories can result in serious injury. Before using this tool, thoroughly read the instructions and make sure you understand its proper and safe use.
Prop 65 Warning: Any machine, accessory or replacement part that may contain brass can expose you to chemicals including lead, which is known to the State of California to cause cancer and birth defects or other reproductive harm. For more information go to www.P65Warnings.ca.gov
Specialized router bits can also be helpful in making cabinet doors, cutting key hole slots, and cutting pieces out from templates.
At Sherline, we manufacture the world's most complete line of precision milling machines, lathes, and chucker lathes (also known as Mini or Micro Mills and Lathes). We manufacture both manual and CNC machines for benchtop or tabletop-size workspaces, along with a full line of accessories to support these machines.
However, there are some basic safety measures you should take when using a router. Many people are afraid of routers…and for good reason.
I’m not a router expert, but I’ve used one a time or two (or a hundred). So I wanted to put together this router guide with all the information that I’ve learned over the years to help others who had questions and are just starting out.
It’s the cheapest option, but also has the least amount of power. It’s great to start out with and you can upgrade later.
Fixed base routers are routers that continuously cut at the same depth. Now, the depth is adjustable between cuts, but unlike a plunge router (I’ll discuss below), you can’t lift and plunge while it’s cutting–hence the term “fixed base.”
Our machines are small in size, but they are capable of making precision parts out of steel, aluminum, brass, or softer materials such as wood and plastic. All of our products are made in the USA. These machines are perfect for light-industrial and home-shop use.
They may come in different sizes and they may be called different names, but they generally fall into one of these categories: trim, fixed base, or plunge.
But, if you are taking a lot of material off at a time or cutting through thick material (like cutting out a circle table top), it may be best to make several passes, going a little deeper each time.
The depth is adjusted by adjusting how far the router bit sticks out of the base. When routing a small decorative edge, you may be able to make one pass and cut your edge.
KennametaltoolingCatalog
That’s a tricky question to answer because routers are SO VERSATILE, so you may use them a little differently for each application.
That said, if you think you may ever want to use the functionality of a plunge router, I’d recommend getting a fixed base router that has the add on option to use it as a plunge router as well. Like a 2-in-1.
Straight bits come in different sizes and are commonly used for cutting dadoes. I also use them when I cut out round table tops.
I got my fixed base router because my trim router just wasn’t cutting it (pun intended) to help me cut out circles in 2x material. The larger router is much easier to control, too, so I feel more comfortable using it.
They usually have two handles on each side so they can be held and controlled with two hands. And they are usually larger and more powerful than trim routers.
You can see the chamfer along the bottom edge of the tray in the first photo below, the Roman Ogee around the edge of the door, and the round over on the cabinet door frame below.
Routers can use A TON of different bits. Here are several different types you can browse through to see all the options.
Quick Changetool post size chart
A collet is the metal sleeve on a router that you insert a router bit into. A shank is the part of a router bit that gets inserted into the router. (This is just like with drills and drill bits.)
The larger router cuts much thicker material than my small trim router without bogging down and is much easier to control with the two handles on each side.
*NOTE: You must use the Headstock Riser Block (P/N 1297) to use the Quick-Change Tool Post, or any other tool post when mounting them to the top of the compound slide. Other tool posts may need to be modified in order to get your cutter on centerline.
Routers come in many shapes and sizes. I’ll cover the various types below, but, basically, a router is a power tool that uses a shaped cutter (or a bit) to make decorative edges, or grooves in wood.
All images and text on this site are property of Woodshop Diaries, LLC. Please be respectful and don't steal this content.
Once you install the base back on, you can adjust the base up and down (mine has a turning wheel for extra precise adjustments) to set the correct cutting depth you want (see below for cutting depth details).
I can’t say much about router tables as I don’t personally have one. However, they can be a VERY useful tool to have–it’s on my wish list.
TECHNICALLY, a trim router is also a fixed base router, but when I talk about fixed base routers, I typically think about mid and full sized versions. Trim routers are kind of an animal of their own.
The scariest part of a router is that it’s not a trigger switch like a drill. You flip the switch and it’s on. And it stays on whether your hands are on it or not.


 0086-813-8127573