
Stone-Grade Tungsten Carbide Rod (1.5mm x 330mm) - carbide rod

The hammer action on an SDS+ drill is driven by a piston firing the drill bit forward and pulling it back. The slots on the SDS+ drill bits allow an amount of back and forth motion and this, along with the smooth ball bearings, increases the strength of the hammer action of the drill. It also reduces friction inside the drill. In other hammer drills (or percussion drills) the whole chuck will move back and forth. As you can imagine this is a much less efficient way of delivering the energy, as the impact will be less concentrated than with an SDS+ drill.
Also, there's the risk of forgetting how close things are to the underside of what you're cutting. (You might have only a half inch under your 2x4, which could result in you cutting some gravel or flinging a loose chunk of something.) You might be relying on your sawhorse to take a tiny kerf worth of damage, but end up hacking the horse in half.
This video has some tricks for experienced users. He likes a worm drive saw. I prefer the sidewinder type. Also, user preference but worm drive saws tend to be easier to use in some ways because the motor is mounted front to back so it's not fighting you from keeping the saw straight. With a sidewinder type you have to constantly adjust to keep the saw straight. The downside of the worm drive saws are that they are heavier and more expensive so as a novice you probably won't be using one anyway.
The best way to cut sheets in my opinion is to use a cutting guide such as the factory edge of the plywood/osb. Nail or screw the guide on either end 1 1/2 inches away from where you want to cut and hold the edge of the table against that edge and push it down the straight edge. You need to set the depth of your saw to pull this off. If you don't want to score the sheet underneath you can adjust it to just shy of touching the sheet underneath. Using this technique you can cut straighter than you could with a table saw and not necessarily parallel. It also saves you from having to bother chalking the line and following the chalk line, so when you get fast enough with it, the time to cut is comparable to chalking a line. If you don't understand these instructions this isn't for you.
First you need to work out the application(s) for which you will need the drill. If you are regularly drilling into brick or other hard substances then an SDS+ drill is essential, if only for the time and energy saved.
Time saving essentials such as the Armeg Electrical Box Sinker, which allows you to drill a square hole in less than 2 minutes, can only be achievable with an SDS+ system. By drilling square holes into brickwork, without the need of using a hammer and chisel, electrical boxes can be installed very quickly and you can be guaranteed a perfect finish every time.
Remember:When using standard drill bits in a chuck adaptor or alternate chuck on your SDS+ drill, the hammer action must not be enabled.
Most drill users will be familiar with this mode where the chuck rotates the drill bit and the bit bites into the material. To be used only on soft or light materials. You can use standard drill bits in this mode with an SDS+ drill chuck adaptor.
At the end of the day a saw blade is just a disk of many chisels. If you were trying to reduce blow out when cutting through a piece of wood with a blunt chisel, how would you hold it? Now think of what the saw blade is doing.
All of this also means there is no need to lean in hard on to the drill to get it to work efficiently. The hammer action is sufficient without the need to apply a large amount of pressure so you are able to let the drill do the work.
When using a circular saw to cut through panels or dimensional lumber or whatever, the DIY folk on YouTube always set the cut depth to “a hair beyond what you’re cutting”. I’ve been blindly doing the same, but realized the other day I have no idea why.
This is also known as ‘rotary stop’ or ‘chisel’ mode. The rotary motion of the drill is switched off and the hammer action only is applied. The piston inside moves back and forth driving the drill bit (usually a chisel or point SDS+ bit) back and forth, driving it in turn into the material.
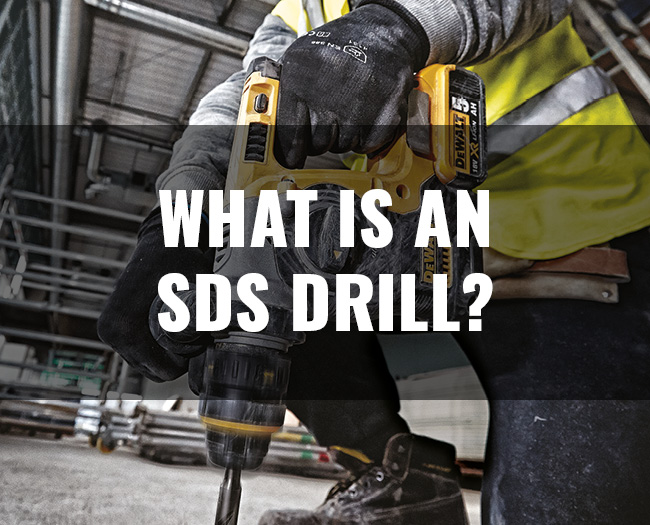
At ITS we often get asked what exactly is an SDS Drill and whether or not its worth having in the tool box. In this article we hope to give you as much information as possible, so you can make the decision to add one to your arsenal or not!
I can't prove this, but intuition tells me that a saw cut that binds/jumps is worse with lots of blade out, versus "the right amount of blade".
This is partially the same reason saw blades with more teeth make cleaner cuts. More small cuts are better than fewer large cuts.

SDS+ drills work on the basic platform that all rotary drills work on which means the rotary motion can be utilised with a standard drill bit. You will, however, need to use a chuck adaptor to enable the drill bits to fit. Some SDS+ drills now come with interchangeable chucks so that you can use normal or SDS+ bits easily.
For cutting dimensional lumber, the pros generally don't set the depth unless it's nailed down or something. You can actually achieve straighter cuts by holding the front of the table on top of the board, line up you cut and plunge down onto it as demonstrated here. Also, going full depth it's easier to cut straight as the saw blade itself is acting as your guide. If you're super concerned about kick back you probably haven't been using a saw long enough and should master the basics before attempting this.
Never put your fingers under the board close to the blade no matter what depth it is set to. It's not like a knife where you can stop cutting yourself. They will be there and then not and they don't grow back. There's nothing wrong with a bit of caution especially with power tools.
This is as above; however, the piston inside the drill will drive forward, in turn driving the drill bit forward. This is the most common mode used when using an SDS+ drill as it achieves the desired goal.
There are also specialist chisel bits available including SDS+ Scutch Comb Chisels for preparing a surface and Cable Guide Drill Bits to make guiding cables through walls painless.
Having the blade further away so it is barely coming out of the wood as it is cutting means it is more perpendicular when exiting the bottom face, in effect making a smaller cut.
Many people are unaware of the sheer number of accessories and drill bits that are available to be used with an SDS+ drill. As well as standard SDS+ drill bits, ITS also stock extra-long bits and accessories such as the Armeg Channelling Chisels which produce quick, clean and smart channels in brickwork for trunking.
If you're cutting on top of a stack of sheets or something you don't want to cut deeply into you should set your blade to depth unless you want to put a piece of wood underneath it to keep the blade off of the floor or ground or wherever you're cutting on top of.
As a rule, 3 mode drills have always been a more expensive option; however, nowadays the price difference is often negligible on most models. The prices of all SDS+ drills are also much closer to a rotary or percussion drill price, which is another reason why more and more people are choosing to use an SDS+ drill.
If, and I hope this doesn't happen, you were to cut a 2x4 across the toe of your boot with a full blade, it would be much more disastrous than a blade that's only projecting 1/4".
Sure, obviously you need to make sure you cut through the whole thing you’re cutting. But short of protecting your workbench, why not just sink the blade as deep as possible as a default and only lift it up when there is an actual underlying surface.
These slots or indentations allow the bit to be thrust forward by the hammer action of the drill, whilst still being retained by the drill due to 2 sprung ball bearings that lie in the slots of the drill bit. This differs from the standard drill chuck system where three arms grip the round drill bit.
Set the blade to depth. Don't put your fingers close to the blade. Using two hands is probably advisable especially if you are not familiar with the tool. Hold onto the saw tightly and do not let go if it kicks back. Let go of the trigger but don't let go of the handle. You really don't want a saw jumping out of the cut and dancing around by your feet. Also, use a square and mark a line. The skill saw wants to go straight. If you try to twist it in the cut that's when the blade will grab the sides of the cut and try to throw the saw backward. Make a line to follow even if you don't have an exact measurement. Following a line is also good practice.
There are also SDS max drills and bits; these are for larger applications and both bits and drills are much larger than their SDS+ counterparts. They use a different system and the fitting on SDS max is not compatible with SDS+.
There are various claims for the meaning of SDS+, the most commonly accepted being ‘Slotted Drive System’ although it is more likely to stem from the original German phrase ‘steck, dreh, sitzt’ that translates as ‘insert, twist, fits’. Bosch use another term; Special Direct System, for international purposes.
The ‘Slotted Drive System’ means that SDS+ drill bits have slots at the end of the shank which fit into the chuck of an SDS+ drill.
Any saw manufacturer is going to tell you to set the blade to the depth of the material to keep people from cutting their fingers and toes off.
Stack Exchange network consists of 183 Q&A communities including Stack Overflow, the largest, most trusted online community for developers to learn, share their knowledge, and build their careers.
This is about the angle of saw tooth compared to the angle of the wood. Intuitively if the saw blade is deeper (more blade sticking out) the tooth is more parallel to the surface as it exiting the wood increasing the chance of blow out.
This is more of a preference of the user determined by experience in my opinion. I formerly worked building houses so I've probably made hundreds of thousands (I wasn't counting) of saw cuts.
Reminder: Answers generated by artificial intelligence tools are not allowed on Home Improvement Stack Exchange. Learn more
At the end of the day, do what's right for you. If you can build effortless systems around being safe with a bunch of blade, then go for it. For what it's worth, though, my coworkers who reset blade depth accordingly are generally better at their jobs. (Not trying to draw a causal link; just noting a correlation.)


 0086-813-8127573